
I’ve been thinking about renaming my blog. Instead of Pies & Puggles, I’ve been thinking about calling it “The Unrepentant Young House Love Fangirl Blog” or TUYHLFB for short.
That’s a joke.
Kind of.
In any case, y’all know how much I love me some YHL. And so when they made their product design debut earlier this year by coming out with their very own lighting collection, I knew I would be obtaining at least one of their items for my very own. Plus all the lights are made right nearby in Richmond by Shades of Light, a local Virginia company. So I’m also shopping local! Kind of.

Here’s a photo from my trip to Shade of Light earlier this month. In among these shades are some of the ones John and Sherry designed, like that one with the Burger silhouettes. Cute, huh?
But that’s not what I bought. What I bought was this, which I thought was pretty much of a steal at just $89.
 |
| Photo via ShadesofLight.com |
Just a word about the fixture itself: it came disassembled, which I wasn’t expecting since that wasn’t noted in the catalog or on the website. That said, it was pretty easy to put together. However, we did hire an electrician to put it up.

The main reason was that we wanted to move the electrical box to be centered over our dining table, where the original fixture was not.

It was about four inches too far toward the kitchen wall and about two feet from the center of the table. Not close. And though we are willing to replace fixtures, we are not willing to mess with moving wiring. It’s good to know your limits, yes?

However, we did not want to waste the electrician’s time with figuring out where to put the pendant while he just stood there so we did that the night before. That’s our highly scientific system above. Yep, a roll of hem tape tied to some kitchen string.

To figure out where to mark the ceiling, Doug took that weighted string and dangled it over the top of the table, inching it over until it was smack in the middle. Centering it with the mid-line was easy because it’s an expandable table so there’s a seam. But the weighted string came in handy for centering it width-wise.

Then when the electrician came, all he had to do was cut a hole, move the box, hang the fixture and patch the hole in the ceiling where the old fixture was.

My only regret is that I think I had him hang it just a little too high. In general, the guideline is to hang a pendant 27″ to 36″ above a table. This one is hung at 32″ inches above. I’m hoping he left enough cord that at some point we can drop it down another two or three inches because even though I thought I wanted it well out of the way, from most angles (especially these camera angles) it just looks too high to me.

But here’s a close-up, where it looks fabulous!
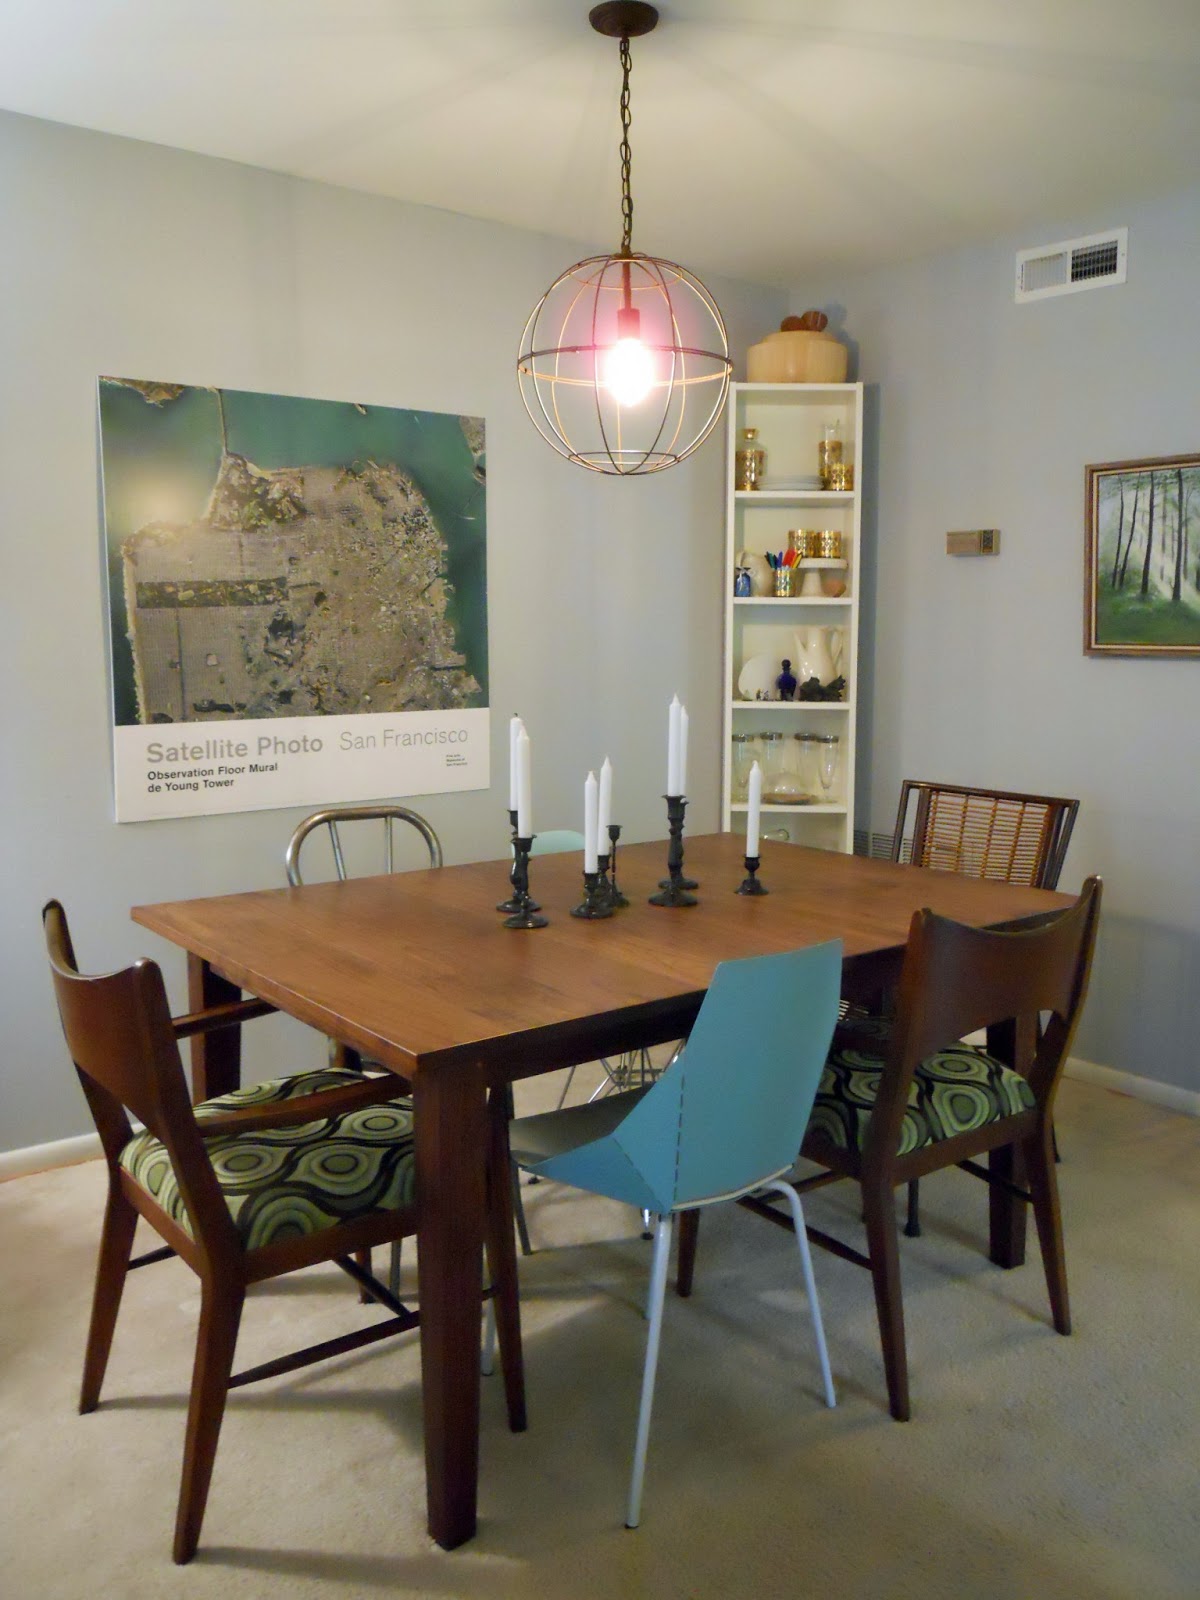
And here it is from a slightly different angle with the light on.
Just in case you were wondering, the bulb doesn’t come with the fixture, but it’s obviously the right choice. Shades of Light sells them for about $20 so you can order one when you order the fixture, but I’d recommend that you visit your local Home Depot instead, where they can be had for $10. Exact same bulb. Exact same manufacturer. Half the price. Just choose carefully because these are fragile on the inside and several of the ones I looked at were already busted.
Finally, since I never know what things should cost and sometimes finding that information online can be difficult, we paid $400 to have this pendant and the light in the office hung. That might sound like a lot, but the contractor we use sent two guys and they were here for 4 hours. Here’s all they did:
- rewired the plug in the office so that the light switch turns on the overhead light
- shortened the cord on the fixture we selected
- hung the office fixture
- removed the old dining room light
- cut the hole for the new fixture
- moved the electrical box
- assembled and hung the new light
- patched and primed the hole where the old fixture was
All told, it seemed like a fair price to me, especially since it would have taken us days of patching, sanding and priming to get that old hole patched. The next time I have to do something like that, I’m totally going to borrow a nifty heat gun like the one they had because it made the whole patching process so much faster! Like, a few minutes instead of several days. So I learned something too!
This is a post from Pies and Puggles. Republishing this article in full or in part is a violation of copyright law. And it isn’t nice. © 2010-2013, all rights reserved.
Yep, that is a FAB lamp!! Jealous…
Well, the good news is that it's super affordable! And you could probably change out lighting as long as you put it back, right?